And on top of that, iTunes is getting discontinued makes it even worse because that’s how transferring data was made possible. Now, does that mean transferring data to your IOS devices has become even more difficult? That’d be crazy because there are many instances when we want to transfer data from our computer to an IOS device regularly. It could be work-related or just for personal reasons, like storing memories. In those cases, what do we do? Thankfully, there are many ways to go about it, and in fact, these ways are much easier than doing it via iTunes. Let’s look at some of the best ones.
WALTR 2
WALTR 2 is like iTunes but on steroids. It supports over 36 different file types, all of which can be easily transferred into your IOS devices with ease. No matter if it’s music, PDF, EPUB, or even less popular formats like VOB, FLV, and AIFF, this tool is capable of handling those. Let’s say you want to transfer MP4 files from your computer to your iPhone. Here’s how you’d do it: Step 1: Download the WALTR 2 software on your computer and install it. Step 2: After the installation process is complete, you’ll see a screen like this that says, “Start my WALTR 2 trial”. Click on that and move to the next step.
Step 3: Now, you’ll be asked to enter your email address to receive the activation key. Step 4: Once you receive the activation key on your email, copy that and paste it into the software. You should see a confirmation message like this.
Step 5: Connect your IOS device now. WALTR 2 will automatically identify which IOS device it is, and it’ll function upon that.
Step 6: In this step, you’ll have to drag the MP4 file into the software, and it’ll be ready to be transferred to your IOS device. That’s about it, simple and easy! In those 24 hours of the free trial, you shall get a taste of how good the software is, so if you’re satisfied with it, you should definitely upgrade it to premium as it’s a handy tool to have. WALTR 2 has been mentioned by some of the world’s biggest companies, such as Forbes, Macworld, Wired, and Fox6 News.
MobileTrans
Easily transfer and restore data, along with Whatsapp files with Wondershare MobileTrans. It’s used by over 50 million people and has a TrustPilot Score of 4.6/5, which is pretty impressive.
You can transfer data from your computer to your IOS device or other phones, even if it’s Android. Transferable file types include music, apps, messages, videos, and more. This tool does really well when it comes to cross-functioning, as it allows you to backup data from your phone to your computer, and you can restore it whenever you want. Wondershare MobileTrans can be downloaded on Windows and as well as on macOS.
AnyTrans
Completely manage 27 different types of data to backup and transfer at any point of time to your IOS devices with the help of AnyTrans. You can transfer data from computer to your device and from device to device so that you don’t waste your time going the long route. Follow the below steps to transfer data from your computer to your iPhone: Step 1: Download and install the software on your computer. Step 2: Once you’ve installed it, you’ll be asked to connect your device to your computer via USB.
Step 3: Now, you should see a screen like this. Click on where it says “Add Content to Device” below the iPhone mockup. After that, you can select the files that you want to transfer.
Step 4: In this step, you’ll be asked where you want to transfer the data. Select the appropriate folder and hit “Next”.
Step 5: Give some time for the transfer to complete. Once it’s done, you’ll see this message, which means we’re all done!
As a side note, you can choose to backup your entire data or even selectively the ones you need to. There’s also an option to automatically backup your iPhone data wirelessly, which is pretty cool. You don’t need any tech knowledge or past experience to use this tool. I believe even your 12-year old neighbor could do it with a bit of guidance. It’s that simple and easy. 😉
EaseUs MobiMover
It supports data transfer between two IOS devices and your computer; EaseUs MobiMover is another straightforward and intuitive tool. It lets you transfer photos, music, and other types of data with just a few clicks. The process is basically almost the same and simple as the other tools in this list. You connect your device, select the data, and hit “confirm” to start the transfer. It comes with a free version and a PRO version, which you can check out after trying out the free one. Apart from data transfer, there’s also an option to unlock your device if you cannot access it. You can unlock face ID, Touch ID, 4-digit passcode, and 6-digit passcode.
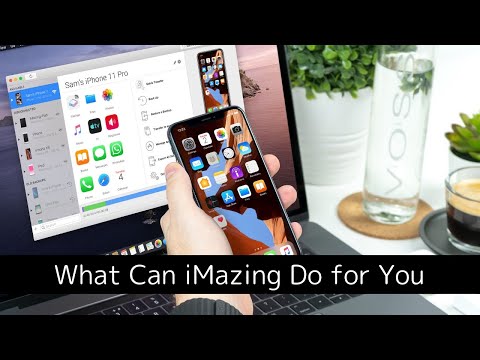
iMazing
Last but not least, iMazing gives you full control over your IOS device, and data management is one element of that.
You can transfer, backup, and restore numerous types of data, including:
Messages Contacts Safari data Ringtones PDFs and eBooks Call history Notes and voice memos
This tool is trusted by over 10 million users worldwide, and while there are various reasons behind the large customer-base, one such reason that cannot be ignored is the fact that it’s multilingual. It supports 11 different languages, such as Deutsch, Italiano, and Russian. You can get started with iMazing for free, and it’s compatible with both Windows and macOS.
Conclusion
The above tools are some of the best options to transfer data to your IOS devices without iTunes. You can be assured that all of them do a great job regardless of their price and age in the market. 🙂 Next, you can check out some of the best tools to recover data from iPhone and iPad.
![]()


![]()
![]()
![]()
![]()

![]()


![]()
![]()
![]()

